Changelog
Here are the latest product updates from EasyRoutes. If you have feedback or suggestions, please reach out — we'd love to hear from you!
Here are the latest product updates from EasyRoutes. If you have feedback or suggestions, please reach out — we'd love to hear from you!

We've added a new Route Option, allowing users to automatically dispatch routes to their assigned driver as soon as they're created. Auto-dispatch can be enabled from the Route Options panel prior to creating any route, or toggled on when creating or editing any Workflows. Note that driver auto-assign and route scheduling must also be enabled in order to activate driver auto-dispatch.
EasyRoutes' new Delivery Zones feature allows route planners to draw custom shapes on the map, and limit routes to only include orders that fall within the boundaries of these shapes. Draw multiple zone shapes according to warehouse locations, drivers' preferred delivery territories, or to match areas delivered to on a particular day of the week, and automatically ensure only the right orders get routed.
Delivery Zones can also be imported via .KML files for even quicker configuration, using geographical boundaries drawn or generated using external tools like Google Earth, or exported from open data portals with locally applicable data sets.
Get started by configuring or importing custom Delivery Zones from your EasyRoutes Settings > Delivery Zones tab. For full details on creating, editing, and working with zones to create optimized routes, see the support article for this new feature.
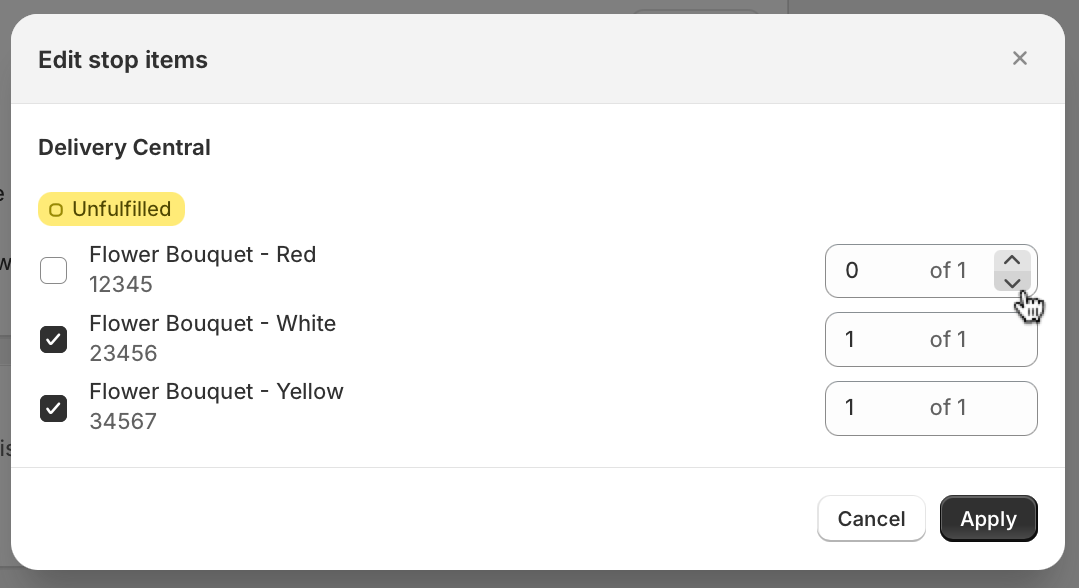
We've made some adjustments to item fulfillment workflows, unifying the selection interface available from both the Edit Stop page, as well as the editable Items column for any stop's entry on individual Route pages. Each of these sections of EasyRoutes now contain the same set of toggles as shown above, making it easier to update fulfillment quantities for individual stops across the app.
For full details on working with item selection and order fulfillment within EasyRoutes, see this support article.
Version 1.0.79 of the EasyRoutes Delivery Driver mobile app is now available to download for iOS and Android devices. This release features support for displaying individual item & total route weights in mobile inventory views, a new "Go To Address" button long-press action to quickly copy a stop's address details to the device clipboard, and a new preset "Cancelled" option when marking a stop as Attempted.
Note: Drivers will need to update to the latest version of the app (v1.0.79 or above) in order to take advantage of these new features and improvements included in this release of the EasyRoutes Delivery Driver mobile app.
Version 1.0.78 of the EasyRoutes Delivery Driver mobile app is now available to download for iOS and Android devices. This release features improvements to photo & signature proof of delivery upload, as well as new functionality allowing route planners to hide customer phone numbers from displaying in the mobile app.
Note: Drivers will need to update to the latest version of the app (v1.0.78 or above) in order to take advantage of phone number masking and photo upload improvements included in this release of the EasyRoutes Delivery Driver mobile app.

We've added a new setting to EasyRoutes, allowing route planners to hide customer phone numbers when accessing stop details from the Delivery Driver mobile app. Users can enable this new mobile feature from their EasyRoutes Settings > Driver Settings tab, within the Driver app settings section shown above.
Drivers will need to update to the latest version of the mobile app (v1.0.78 or above) in order to take advantage of this new feature.
For additional details on showing or hiding particular order/stop details within the EasyRoutes Delivery Driver mobile app, see this support article.
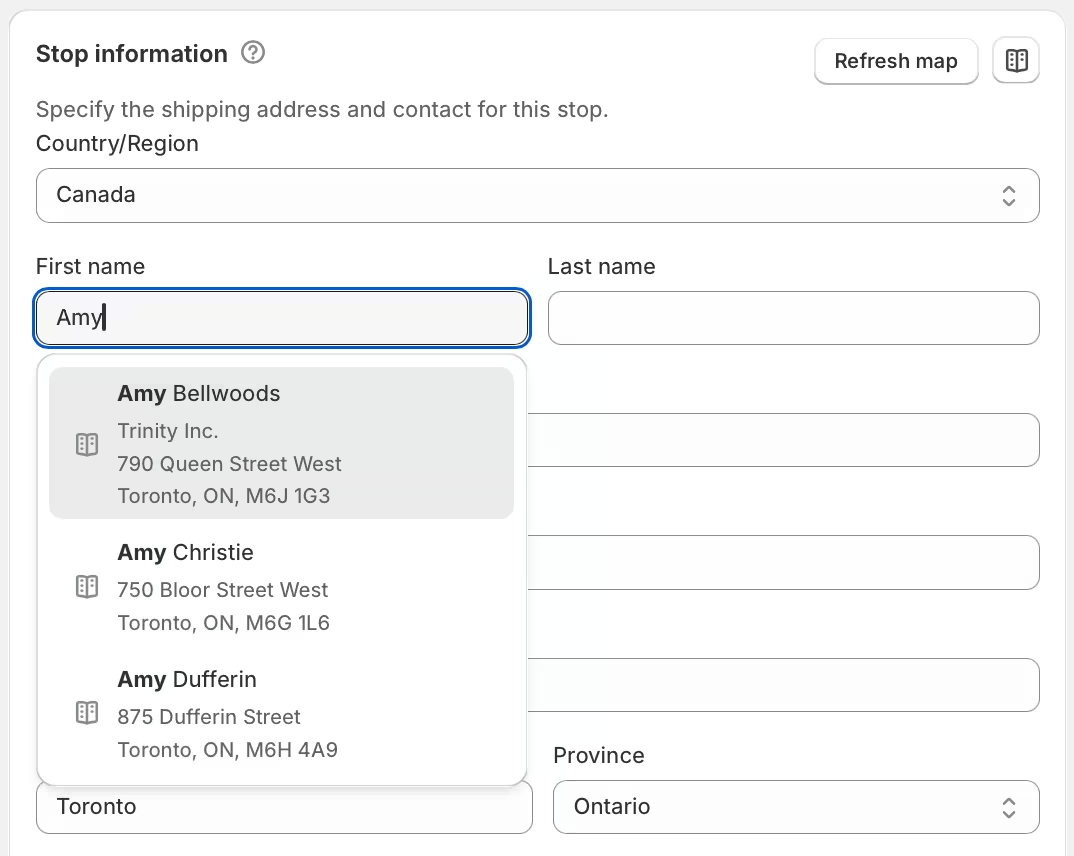
We've rolled out some improvements to Address Book auto-fill behaviour, making it easier for route planners to substitute saved stop details when adding custom stops to a route, or editing stops on existing routes.
EasyRoutes will now search for and suggest matching Address Book entries when adding custom stops to a route, or editing the details of existing stops on a route. Users can trigger auto-fill suggestions by typing into any of the First name, Last name, Company, or Address fields found within the Stop information panel (shown above) on the Add custom stop and Edit stop pages.
Entries tagged with a book icon like the three displayed above represent matching Address Book auto-fill suggestions; entries tagged with a map pin icon represent matching geolocated addresses provided by our mapping service.
Saved address details from the Address Book will now also be auto-filled in the same manner (alongside existing geolocated address suggestions) when adding custom locations to the Start/End Locations Route Option.
Version 1.0.75 of the EasyRoutes Delivery Driver mobile app is now available to download for iOS and Android devices. This release features upgrades to core frameworks powering the mobile app, as well as minor bug fixes and performance improvements.
This update also includes new minimum device OS requirements for app compatibility: Android users now require Android version 7.0 or later; iOS users now require iOS version 15.1 or later.
Note: Drivers will need to update to the latest version of the app (v1.0.75 or above) in order to take advantage of the fixes and improvements included in this release of the EasyRoutes Delivery Driver mobile app.
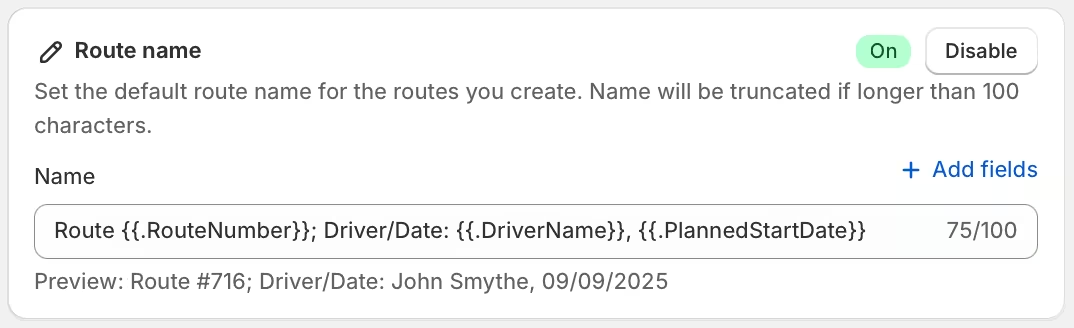
We've added a new Route Option, allowing users to set a custom naming template for new routes, including dynamic variables that apply to each route, such as assigned driver name or a route's scheduled start date. Enable and configure a naming template from the Route Options page prior to creating a new route, within the Route name panel shown above.
For full details on adding variables to the naming template, see the support article for this new feature.
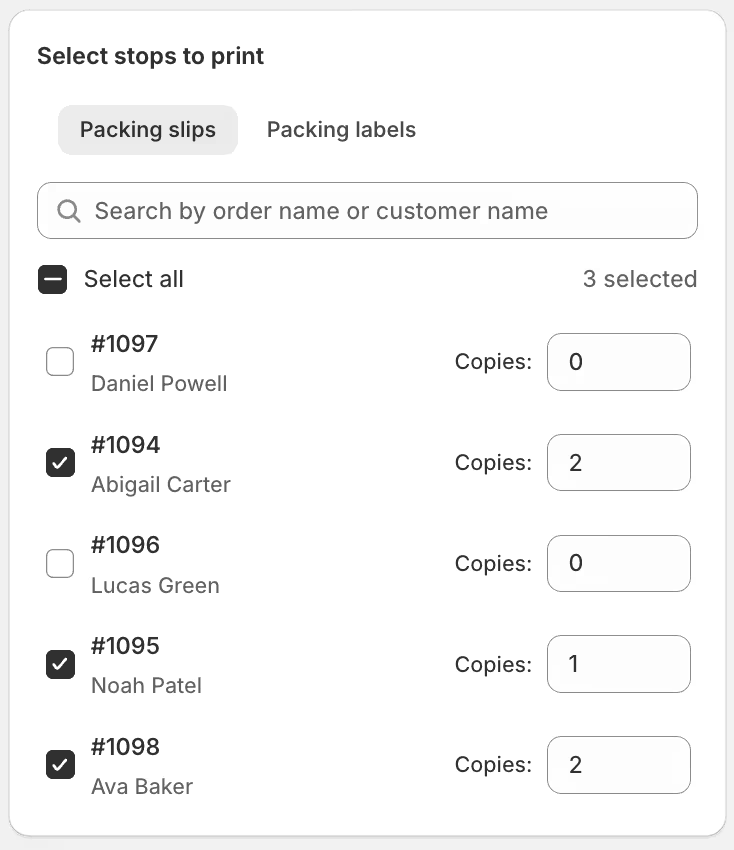
We've added a new configuration panel to EasyRoutes' route printing feature, allowing users to customize the quantity of packing slips and packing labels, individually per stop, that will be included in a route printout.
To do so, click the Print button from any route's page, and enable the checkboxes for Packing slips and/or Packing labels; the Select stops to print configuration panel (shown above) will then appear at the bottom of the list of options on the right-hand side of the page, with individual tabs for slips and labels if both are selected. Any slips or labels configured for multiple copies will be printed back-to-back in their routed sequence.
For full details on configuring packing slips, packing labels, and other route printout elements, see the route printing support article.
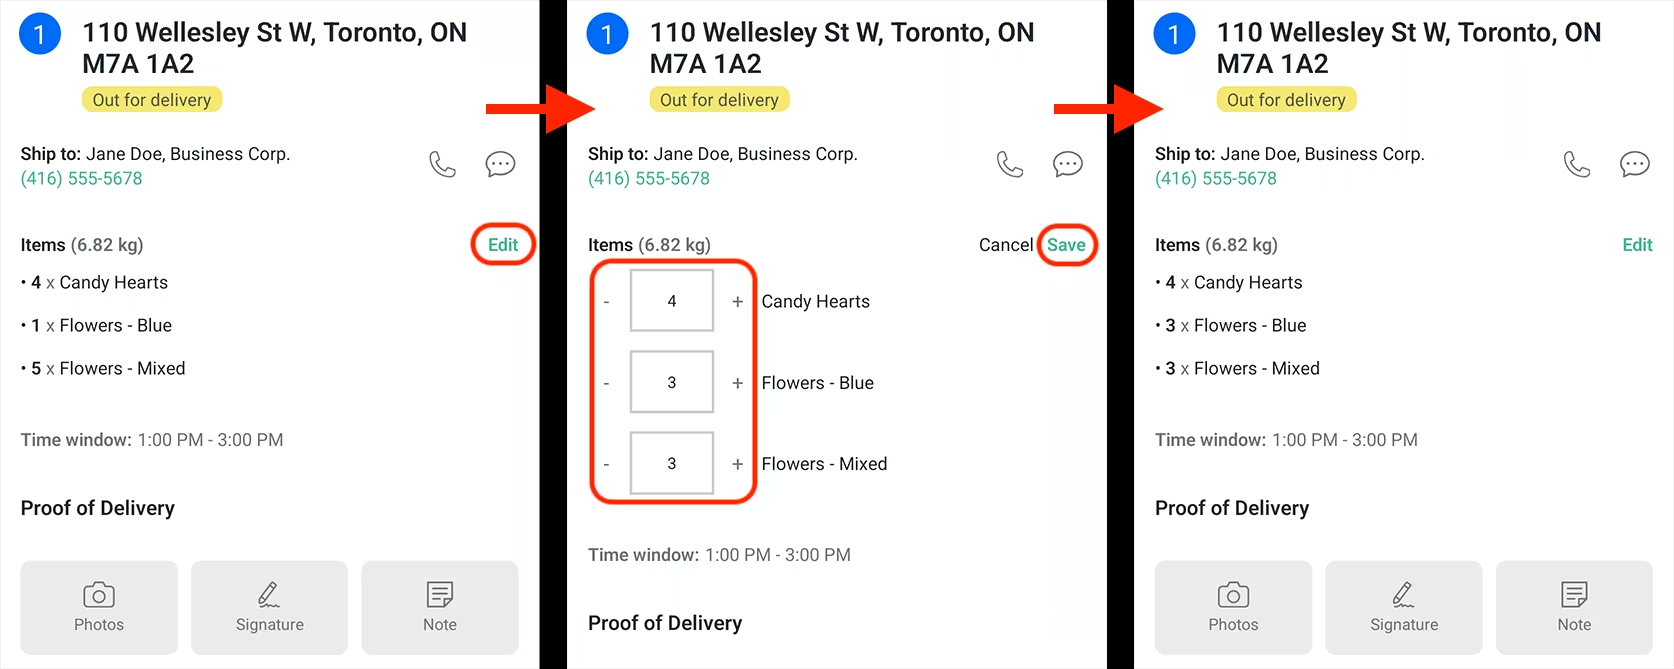
Version 1.0.74 of the EasyRoutes Delivery Driver mobile app is now available to download for iOS and Android devices. This release introduces driver-side support for editing line item quantities for custom and imported stops, directly from the mobile app.
When enabled, drivers can tap the Edit button found on the right-hand site of any stop's item list; update item quantities as desired; and tap the Save button to see updated item quantities reflected in the stop, as shown above. Item quantity updates made in this manner will sync back to each stop in the EasyRoutes admin view for further reference.
To turn this feature on, enable the Allow driver to update custom item quantities setting from your EasyRoutes Settings > Driver Settings tab, within the Driver app settings section. For further details on using this functionality from a driver's perspective, see the support article for this new feature.
While this new mobile feature supports editing line item quantities for custom/imported stops, we continue to support editing/updating order fulfillments for Shopify-native orders directly from the EasyRoutes admin view - more details available in this support article.
Note: Drivers will need to update to the latest version of the app (v1.0.74 or above) in order to edit custom and imported stop item quantities within the EasyRoutes Delivery Driver mobile app.