Changelog
Here are the latest product updates from EasyRoutes. If you have feedback or suggestions, please reach out — we'd love to hear from you!
Here are the latest product updates from EasyRoutes. If you have feedback or suggestions, please reach out — we'd love to hear from you!
We've added the ability to apply a delivery status (i.e. Mark as Ready for delivery, Mark as Delivered, etc.) to multiple stops in a route in bulk.
When viewing a route, use the checkboxes to select any stops you'd like to update the delivery status for; click the More actions button from the menu that appears at the bottom of the page, and select the delivery status you'd like to apply to these stops:

If you've enabled EasyRoutes customer notifications, you'll be prompted with the option to send the notification associated with this delivery status:

Note: Depending on your EasyRoutes settings, marking stops with any status in bulk may also trigger a Shopify order fulfillment. Configure which delivery statuses will automatically fulfill a Shopify order from your EasyRoutes Settings > General tab, within the Fulfillment options section.
We've made several improvements to rejected stop workflows, making it easier to access, manage, and resolve any issues preventing stops from being successfully routed - including support for combined rejected stop functionality for Route Groups.
EasyRoutes will continue to notify users of any rejected stops on route creation with a banner at the top of the Route Page. Click into the Rejected stops tab to see these stops and the reason for their rejection:


Driver Tasks added to saved stops are now stored in the Address Book entry for affected stops, meaning that these tasks will persist on any route a saved stop is added to any time in the future.
Access the Edit stop menu item for any saved stop on your Orders Page:

Scroll down to the bottom of the Edit saved stop page, and add/edit task details within the Driver tasks card:

Click the Update button at the top of the page to save your changes.
Any tasks saved in this manner will persist across all future routes this saved stop is added to. If future routes have additional Driver Tasks added at the route level, tasks saved to the Address Book will be differentiated with a Custom task banner as shown below:

For full details on enabling, adding, and editing Driver Tasks on your stops and routes, see the support article for this feature.
Version 1.0.45 of the EasyRoutes Delivery Driver mobile app is now available to download for iOS and Android devices. This release largely consists of minor backend improvements and bug fixes. Users should not experience any noticeable impact when interacting with the app compared to the previous version.
We've added three new options for printing packing slips, allowing users to include any of three different proof of delivery items (photos, signature, and/or driver note) on packing slips when available, particularly useful when packing slips are used as a post-delivery confirmation document. Enable these new variables directly from the Print Preview menu:

We've enabled three new variables that can now be included in CSV spreadsheets before importing orders into EasyRoutes:

We've added the ability to mark any routes as Archived, ensuring your Routes Page contains only the routes you still need to work with. Any routes that have been archived will be hidden from view to better organize the Routes Page, but remain fully accessible for future review or record keeping using filter controls.
From the Routes Page, use the checkboxes to select any route(s) you'd like to archive. Click the More actions button from the menu that appears at the bottom of the page, and select Archive routes:

Once archived, routes will no longer display on the Routes Page by default. To review routes that have been archived, click the Add filter button at the top of the Routes Page, and select Archived - this will give you the option to display just Archived routes, just Unarchived routes, or All routes to display both types. When viewing All, routes that have been archived will display with a grey background (see the middle three routes below) to differentiate them from unarchived routes:

Routes can be unarchived by applying the All or Archived filter, then using the checkboxes to select routes for unarchiving. Once selected, click the More actions button from the menu that appears at the bottom of the page, and select Unarchive routes:

We've given EasyRoutes' customer order tracking pages a complete refresh! Our new tracking pages are more informative and visually appealing than ever before, and are designed to display seamlessly across all device types and screen resolutions. Customers can access all their order details - including order status, real-time driver location, and proof of delivery - from our new, easy-to-read card-based tracking page layout:

If you've already modified your order tracking pages to include non-default variables, custom ETA and schedule settings, or localized translations, don't worry! All your customizations will be automatically transferred to the new tracking page layout, and no further action is required to deliver the same outstanding experience your customers already expect, in a spruced up and more user-friendly package.
Customize and preview your customer order tracking pages for all order status events from your EasyRoutes Settings > Order tracking tab.
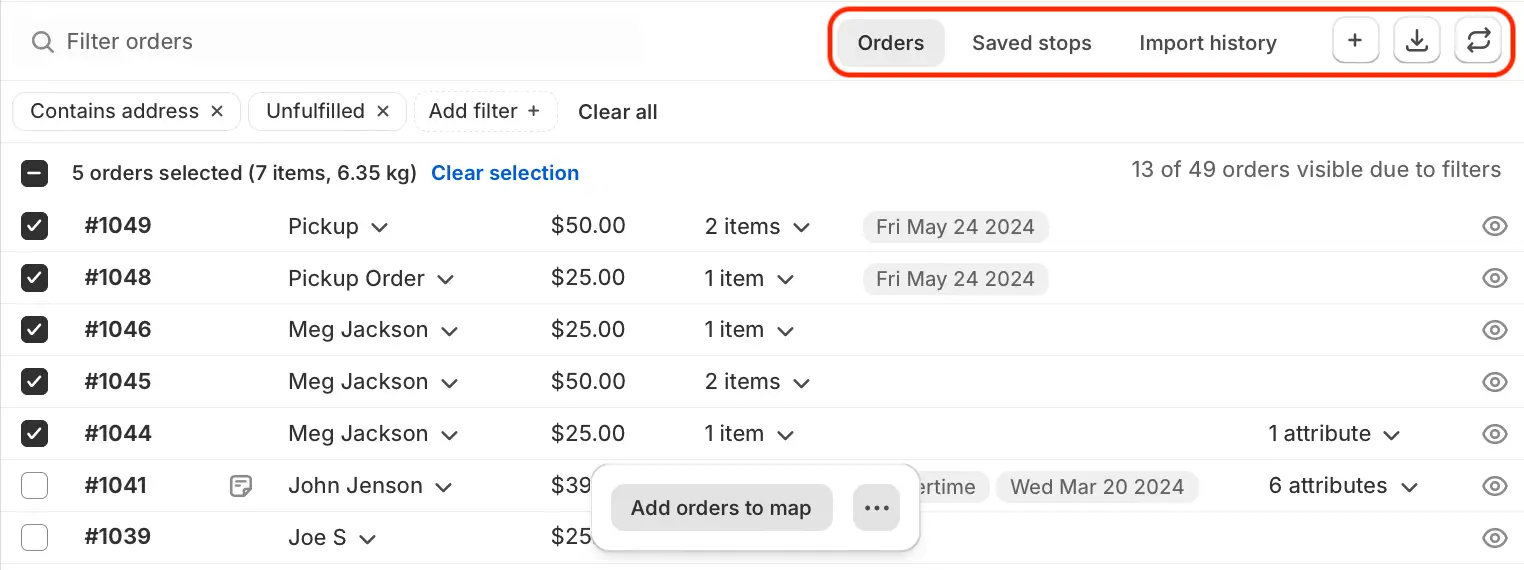
We've made a number of improvements to the Orders Page layout, making it easier than ever to view, sort and route your imported & saved custom stops alongside any Shopify orders. You'll be prompted to enable new layout settings with a banner the next time you open the Address Book (this prompt can also be dismissed using the close icon on the banner):

You can also manually enable/disable these new layout settings at any time from your EasyRoutes Settings > General tab, by scrolling down to the Address book card of the Orders page options section:

Once enabled, new tabs and controls will appear on the upper right-hand corner of your Orders table, next to the Filter search bar.

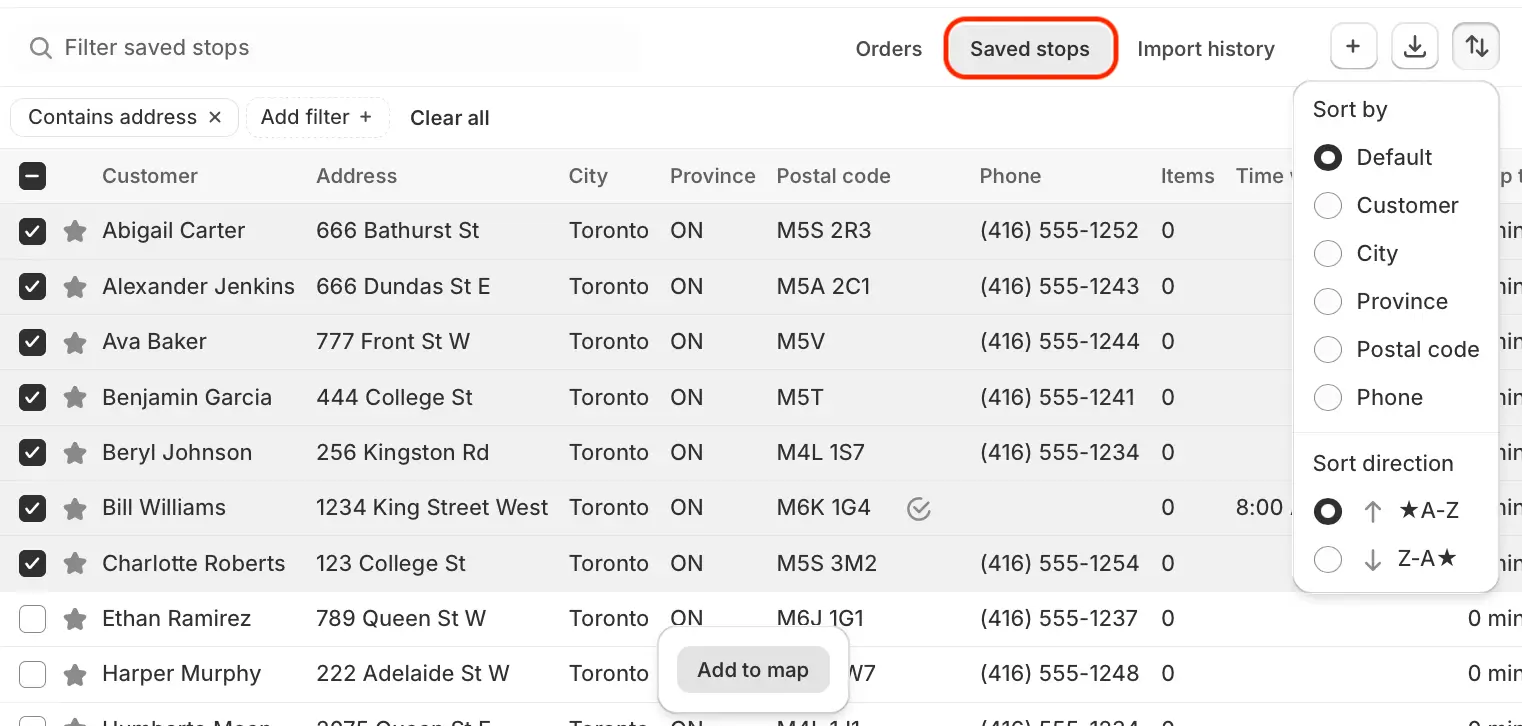
Navigating to the Saved stops tab will provide quick access to any past stops you've created and saved in the Address Book.

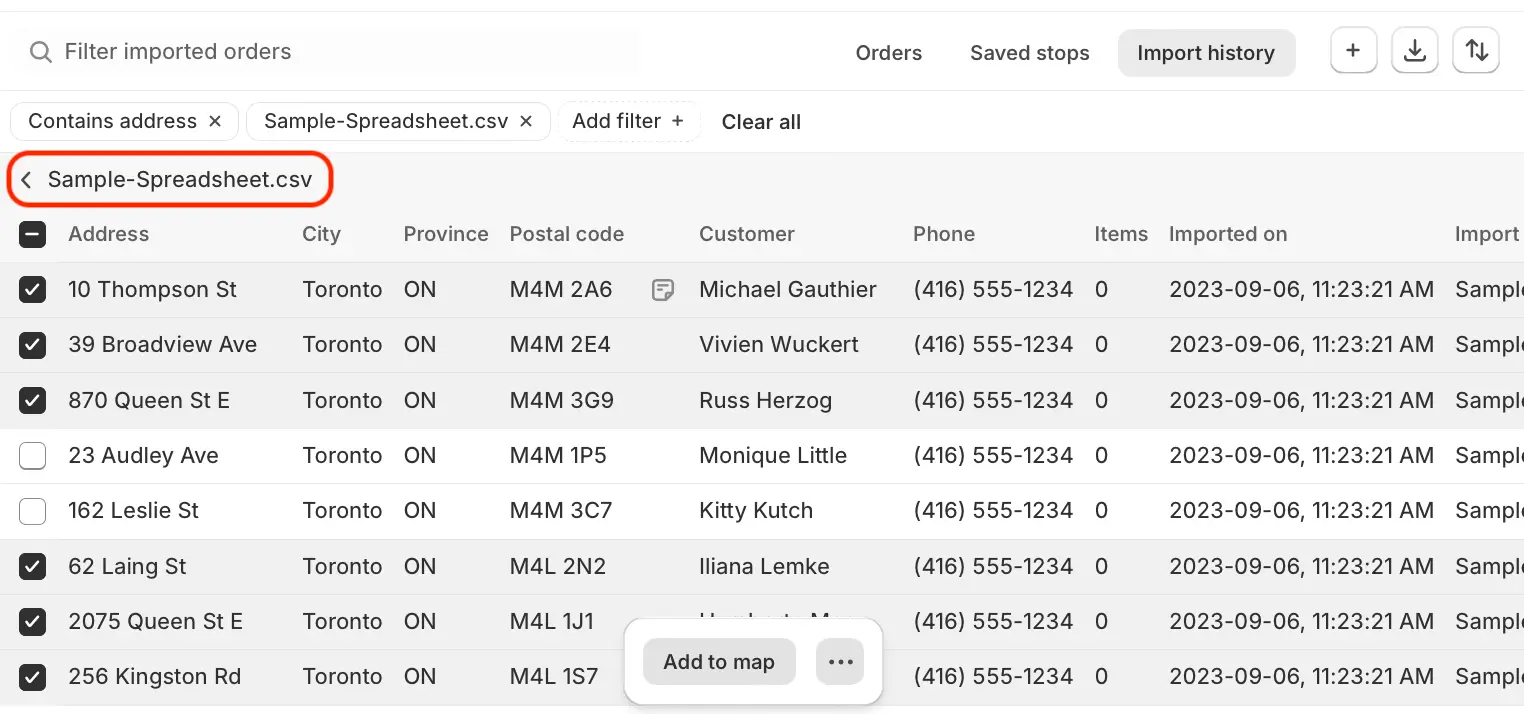
The Import history tab contains a list of all CSV spreadsheets imported into the Address Book in the past. Click the eye icon on any import to access a table of all stops contained in that import:

Use the checkboxes to select any imported orders you'd like to route before clicking the Add to map button at the bottom of the page. After adding orders to the map, click the back arrow + spreadsheet title (highlighted below) to return to the list of imported CSVs:

Notes:

We've added a number of new settings to fine-tune what route information appears in the Dashboard when opening EasyRoutes. Update Dashboard customization options from your EasyRoutes Settings > General tab, within the Dashboard page options section:

We've increased the capacity of EasyRoutes' CSV import tool, allowing up to 15 order/stop data CSV files to be imported in a single batch. Before uploading your CSV files to EasyRoutes, ensure that your spreadsheet column titles match across all CSV files to properly parse all order data when importing.
To import multiple CSV files at once, follow the same steps used to import a CSV file, selecting up to 15 files at once to import. Once your columns have been mapped, the number of files to be imported will be listed at the top of the page. Each CSV filename will be listed below the map, with each file's corresponding orders listed below their title. Use the checkboxes to select individual orders and/or entire files to import at once:
